3d printing master objects for resin casting
Why casting?
Responding to some recent jobs and enquiries for 3d prints that can be used to create moulds for casting, we realised there is a whole new world available to us if we added mould making and casting to our capabilities. By incorporating 3d printing into a mould making and resin cast workflow, we can customise and scale digital designs to precise requirements and then reproduce them quickly and cheaply.
Once we have a mould from a 3d printed master, we can take multiple castings. The customisation benefits of digital modelling combined with low-cost batch production processes are worth exploring. Casting also opens up a new range of resins, urethane plastics, plaster, cement and even food-safe material options.
3d print the mould or 3d print the master?
Armed with some of our own 3d printed designs, we are putting a toe in the water to learn more about casting.
The first question to address is: do we 3d print a master version and then make a mould from it? Or, do we jump straight to stage 2 and 3d print a negative version of the model as a mould in one step?
We did a rush job for a client in the last week (which prompted this whole topic) where we 3d printed the mould. Due to time pressure, we had to use our desktop FDM (filament) printer and PLA plastic to print the mould overnight. Because FDM prints are not watertight, we sealed the surface and used a release agent before casting in resin. However, the resulting mould was rigid and feedback from the client was that even with bolt together sections, it took a lot of force to get the casting out of the mould. Lesson #1: Even for relatively simple shapes, a flexible mould material makes de-moulding much easier. Silicone rubber is widely used to make moulds. As well as capturing surface detail, it is flexible enough to allow the cast item to be easily removed from the mould.
Mould Making
To continue our experimentation, we used one of the Smooth-On starter packs, in the UK these are available from Bentley Advanced Materials. These starter packs offer a low-cost way to try out some of the materials and techniques and come with a lot of information to guide you while you grapple with the basics. The Pourable Silicone Rubber Mould Making Kit, which includes trial sizes of a two-part silicone rubber, two-part resin, sealant and release agent was ideal for our experiments. We had to go shopping for mixing containers (plastic cups are ideal) some nylon gloves (not latex which can inhibit curing), some wooden stirrers and a couple of measuring jugs. We got all of those extras for less than £5 at our local discount store.
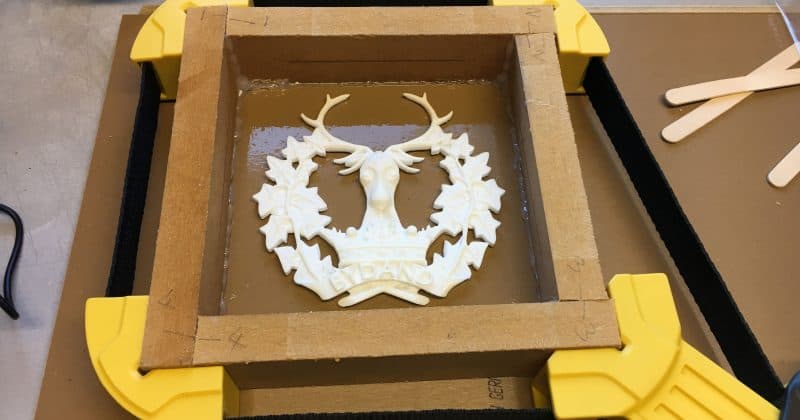
The guidance notes and online video tutorials from Smooth-On walk you through the process. We made our mould dam from MDF blocks held in place with a strap-vice and attached to the underside of a spare floor tile with a glue gun. Calculating the volume of your mould dam ensures that you mix sufficient silicone rubber while not wasting material by mixing too much. As well as sealing the walls of your dam, we would add that you need to ensure the mould material cannot get underneath your master.
As well as sealing the walls of your dam, we would add that you need to ensure the mould material cannot get underneath your master. Lesson #2: With our first attempt, the mould material did get underneath and we had to cut the master out of the rubber with a scalpel and then we had to trim away excess rubber to create an open-backed mould.
Our 3d printed master had a porous surface and a few pinprick holes caused during the printing process. We filled the worst of the holes with modelling putty and used the surface sealer that came with the Smooth-On kit.
Casting
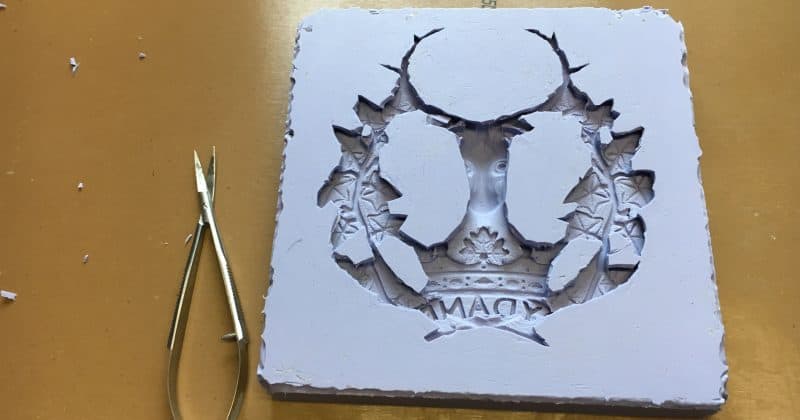
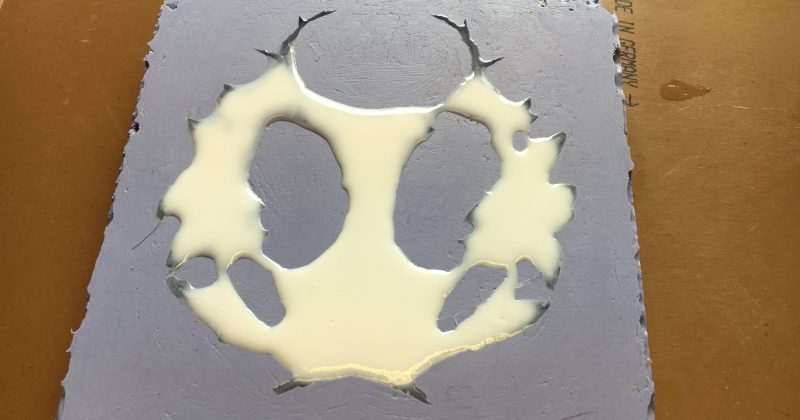
After allowing to cure overnight, we have our mould ready for use. Casting is a much faster process. Apply some mould release, mix the two part resin and pour slowly into the mould. Cure time is only 15 minutes (Smooth-Cast® 300). The resin is initially clear and turns solid white during the curing process.
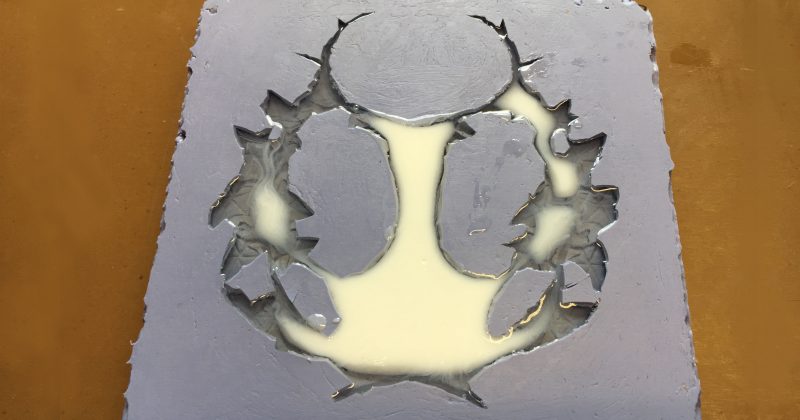
Lesson #3: Don’t overfill the mould (as we did on our first attempt), if the resin flows out over the top of the mould, you have created an unnecessary clean-up task to trim back the excess. However, the good news is that if you do need to trim back material, it can be sanded or trimmed using a Dremmel with a large engraving bit.
Conclusions
A flexible mould is critical to releasing cast objects, even for simple shapes.
MDF is a good material to create a mould dam. It is cheap, easy to cut and despite being porous, contains the liquid rubber.
A good baseboard with a seal that prevents rubber leaking underneath will save a lot of unnecessary clean-up later. Our hot glue-gun solution did not work well and we have ordered up some modelling clay to create a better base for future.
Don’t overfill the mould when casting, but if you do, a Dremmel is ideal for trimming unwanted material.
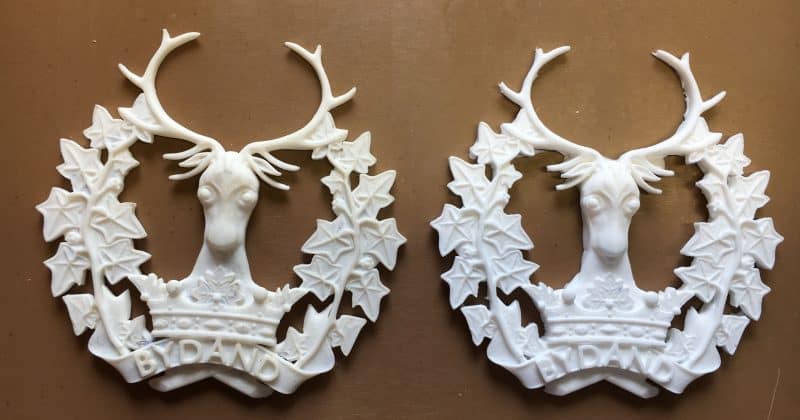
Examining the 3d printed master, some of the rubber material had leaked into the model due to the porous outer shell, but not as much as we feared might. The sealing and release agents worked well and the master was easily separated from the mould.
The surface detail of the cast item is superb with every line and mark on the original faithfully reproduced in the cast. The point to note is that if you are not happy with the surface quality of the original, casting is not going to fix that. Although the cast item can be sanded or machined if required.
Once you have the mould, the casting process is much faster than 3d printing each item one at a time. If you need 20 of something, I suggest it would be worth the effort of making a mould and casting from it rather than printing one at a time.
Adding a casting capability opens up a new range of materials.
Implications for 3d model files
This hands-on experiment with resin casting has given us a better appreciation of how we might design our 3d model files so that they can be used to create simple block moulds for casting. By avoiding under-cuts and reverse-side detail our existing 3d designs would be useful in a wider range of cases for casting and also machining (also known as 2.5d where there are no overhangs in the model). We intend to start creating 2.5d versions of our designs going forward. If you see a model in our catalogue that you would like in 2.5d. Please let us know.
Can we help?
If you have a project needing 3d modelling or 3d printing expertise, contact us for more information…