5 tips: Blender 3d printing text
Blender 3d printing text
Blender is a very powerful and flexible tool for creating and editing model files for 3d printing. While 3d modelling from scratch takes time to learn, we show you an easy way to get started with Blender 3d printing text.
Adding text to an existing 3d model is of the easiest ways to make something unique and personal. If you need a 3d model file to follow along with, you can download our photo frame model for free and modify it as much as you like.
1) Be aware of scale
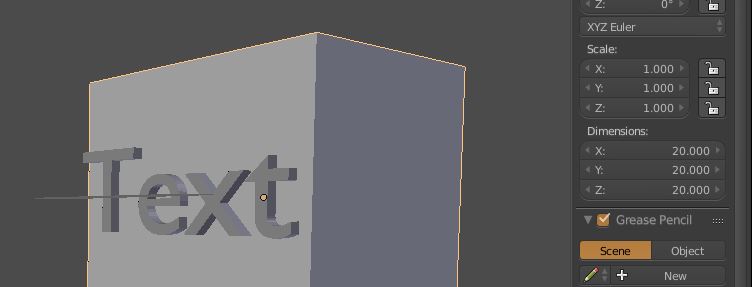
Be mindful of the scale and units. We recommend using 1x Blender Unit = 1mm when preparing models for 3d print. Rather than scaling text in the main window, we recommend sizing the text with the size in the properties panel. This way, if you add an extrusion to the text, 1 Blender unit = 1mm. Otherwise, any extrusions or other settings will get multiplied up by the scaling factor which makes life unnecessarily difficult.
This is really handy if you are working to guidelines dictated by the material you are printing in. If the guidelines say your text should stick out 0.8mm, then you know you need to extrude by at least 0.8 Blender units.
2) Don’t Bevel the text
Do not set a Bevel on the text object. If you do, this creates weird edges and overlapping geometry when you convert the text to a mesh which you will have to clean up later.
If you want a bevel, wait until the text is converted to a mesh and extruded into a solid before adding a bevel modifier.


3) Make it solid
To make the text solid, there are two methods to choose from.
- set an extrude value in the properties panel before you convert the text to a mesh. In this case, the front and back faces of the mesh will not be joined to the sides. To fix this, in Edit mode, select all vertices and from the menu, remove doubles.
- Convert the text to a mesh when it is still a flat 2d shape, and then extrude it to the desired thickness. This will avoid the disconnected faces issue above and save a few keystrokes.

4) Get BoolTool v0.2
Move and orientate your text so that it intersects with the main model. Use a Boolean Union to join your text to the main object.
The built-in boolean modifiers do an adequate job, but it is worth getting Booltool by Vitor Balbio if you are doing a lot of 3d modelling for print. Booltool is a great add-on to use for preparing 3d models for print.
Despite Booltool v0.2 being released back in 2014, we only discovered it fairly recently. If you are using Booltool v0.1, I strongly recommend seeking out v0.2. The joins are cleaner with less crow’s-feet (v0.1 seemed to create a join with three vertices splayed out rather than one, v0.2 does a much cleaner job).
5) Use crease settings for sharp text edges
When Blender exports a 3d model file for print, any modifiers and edge settings for the model are applied during export. This gives you a great way of applying things like subdivision in a non-destructive way where you can come back and increase of reduce the subdivision level later and re-export a fresh copy of the model. However, I can’t think of any scenarios where you would want a subdivision modifier to apply to the text in your model. A neat way round this is to select all the edges of your text in edit mode, and in the “Transform” section of the properties tab, set the Mean Crease to 1. With this done, your text won’t deform as you add and adjust modifiers.

P.S.
A further trick we use. If you select vertices in edit mode, Blender remembers the selection even if you join objects together into a single object using a Boolean modifier or Booltool. You can use this behaviour to make selecting edges of text a bit quicker.
When joining a text mesh to a main object:
- Select the main mesh, tab into edit mode and de-select all vertices <A>
- Select the text mesh, tab into edit mode and select all vertices <A>
- Join the two meshes together using a Boolean Union.
- Tab into edit mode and only the vertices for the text are selected. You can easily set the crease for these to 1 without fiddling around with a complicated selection.
The advantage of setting the crease value after doing the join is that this also includes the vertices and edges at the intersection point between the text and the model.
If you forget this step, and need to select all the text vertices after they are joined. Try selecting a text face then using the very handy
Have your own thoughts on this topic? Let’s get the conversation started, add a comment, feedback, or tip of your own.